Skip to content
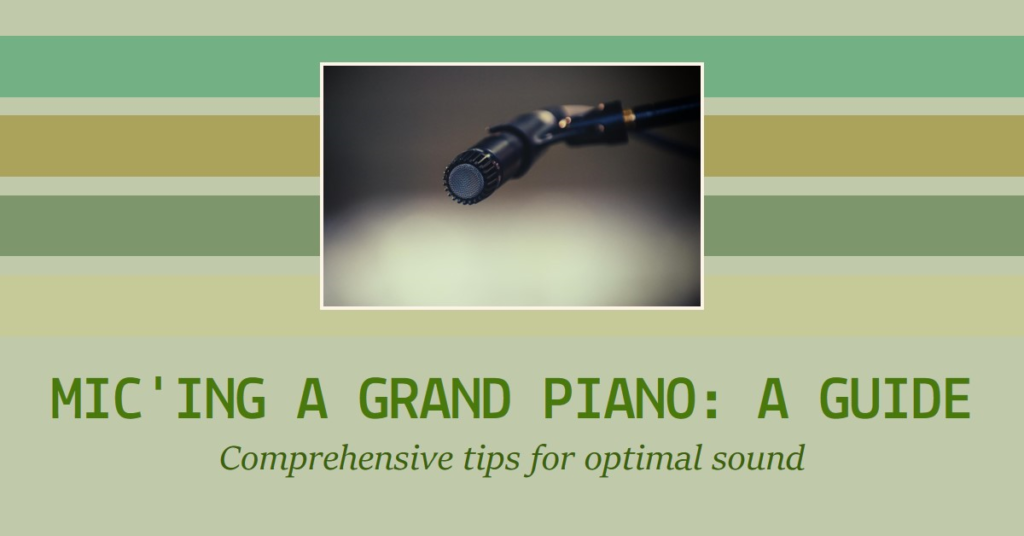
Introduction to micing a grand piano
Micing a grand piano is an essential skill for any audio engineer or musician looking to capture the rich and complex sound of this magnificent instrument. Whether you’re recording a classical piano performance or providing sound reinforcement for a live concert, properly micing a grand piano is crucial for achieving the best sound quality.
In this comprehensive guide, we will explore how to mic a grand piano, the various microphone types, placement techniques, and tips to help you capture the true essence of a grand piano.
Why is micing a grand piano important?
A grand piano is a beautiful and versatile instrument that produces a wide range of frequencies and dynamics. By properly micing a grand piano, you can capture the nuances and intricacies of its sound, allowing the listener to experience the full depth and richness of the music being performed.
Whether you’re recording a solo piano piece or accompanying an ensemble, micing a grand piano helps create a balanced and immersive audio experience.
Different microphone types for micing a grand piano
Choosing the right microphone for micing a grand piano is crucial for capturing an accurate and pleasing sound. There are several microphone types commonly used for micing a grand piano, each with its own unique characteristics and applications.
- Condenser Microphones: Condenser microphones are highly sensitive and capture a wide frequency range, making them ideal for capturing the full spectrum of a grand piano’s sound. They are commonly used as overhead microphones or for close micing individual sections of the piano.
- Dynamic Microphones: Dynamic microphones are more rugged and less sensitive than condenser microphones, making them suitable for capturing the lower frequencies of a grand piano. They are often used in combination with condenser microphones to achieve a balanced sound.
- Ribbon Microphones: Ribbon microphones are known for their warm and smooth sound, making them a popular choice for micing a grand piano. They are often used as room microphones to capture the natural ambience and resonance of the instrument.
Placement techniques for micing a grand piano

Proper microphone placement is crucial for capturing an accurate and balanced sound when micing a grand piano. Here are some placement techniques to consider:
- Overhead Placement: Placing a pair of condenser microphones above the piano is a common technique for capturing the overall sound of the instrument. Position the microphones at a height of around 3 to 4 feet above the strings and angle them towards the hammers to capture the true tonal quality of the piano.
- Close Micing: For a more detailed and focused sound, place condenser or dynamic microphones close to the different sections of the piano. Experiment with different placements, such as near the soundboard, the hammers, or the strings, to find the desired tone and balance.
- Room Micing: To capture the natural ambience and resonance of the grand piano, consider placing ribbon microphones at a distance from the instrument. Experiment with different placements around the room to find the sweet spot where the piano sounds balanced and full.
Tips for achieving the best sound quality when micing a grand piano
Achieving the best sound quality when micing a grand piano requires attention to detail and experimentation. Here are some tips to help you capture the true essence of the instrument:
- Listen and Adjust: Take the time to listen carefully to the sound of the grand piano before micing it. This will help you understand its unique characteristics and guide your microphone placement decisions.
- Test Different Microphones: Experiment with different microphone types and placements to find the combination that best captures the sound you’re looking for. Don’t be afraid to try unconventional setups to achieve a unique and interesting sound.
- Consider the Room Acoustics: The acoustics of the room can greatly impact the sound of a grand piano. Take into account the size and shape of the room, as well as any reflective surfaces, when micing the instrument. Use acoustic treatment, such as baffles or diffusers, if necessary, to optimize the sound quality.
- Monitor and Adjust Levels: Continuously monitor the sound levels and adjust the microphone positions and gain settings accordingly. Aim for a balanced mix where all the frequencies and dynamics of the piano are captured accurately.
Common mistakes to avoid when micing a grand piano
When micing a grand piano, there are some common mistakes that can compromise the sound quality. Here are a few to avoid:
- Placing Microphones Too Close: Placing microphones too close to the strings or hammers can result in an unnatural and unbalanced sound. Maintain a suitable distance to capture the full range of frequencies and dynamics.
- Neglecting Phase Issues: When using multiple microphones to mic a grand piano, be mindful of phase cancellation issues. Adjust the placement and phase settings of the microphones to minimize any phase-related problems.
- Ignoring Room Acoustics: Failing to consider the room acoustics can lead to a muddy or overly reverberant sound. Pay attention to the reflections and resonances in the room and adjust the microphone placement accordingly.
Step-by-step guide on how to mic a grand piano

Micing a grand piano requires a systematic approach to ensure the best sound quality. Here is a step-by-step guide to help you mic a grand piano:
- Preparation: Familiarize yourself with the grand piano and its unique characteristics. Listen to the sound of the instrument and identify any potential challenges or areas of focus.
- Selecting Microphones: Choose the appropriate microphone types based on the desired sound and application. Consider using a combination of condenser, dynamic, and ribbon microphones for a balanced and nuanced sound.
- Placement: Experiment with different microphone placements, such as overhead, close, and room micing, to find the desired sound. Take into account the room acoustics and adjust the placement accordingly.
- Monitor and Adjust: Continuously monitor the sound levels and adjust the microphone positions and gain settings to achieve a balanced and accurate representation of the grand piano’s sound.
- Optimizing the Sound: After micing the grand piano, listen carefully to the recorded sound and make any necessary adjustments. Use equalization, compression, and other audio processing techniques to enhance the sound quality if required.
Equipment needed for micing a grand piano
To effectively mic a grand piano, you will need the following equipment:
- Microphones: Choose a combination of condenser, dynamic, and ribbon microphones to capture the different aspects of the piano’s sound.
- Microphone Stands: Use sturdy and adjustable microphone stands to securely position the microphones.
- Cables: High-quality XLR cables to connect the microphones to the audio interface or recording device.
- Audio Interface or Recording Device: A high-quality audio interface or recording device to capture the sound from the microphones.
- Monitoring System: A reliable monitoring system, such as studio monitors or headphones, to accurately listen to the recorded sound.
Adjusting and optimizing the sound after micing a grand piano
After micing a grand piano, it’s important to listen carefully to the recorded sound and make any necessary adjustments to achieve the best sound quality. Here are some considerations for adjusting and optimizing the sound:
- Equalization: Use equalization to shape the frequency response of the recorded sound. Pay attention to any frequency imbalances and adjust accordingly to achieve a balanced and natural sound.
- Compression: Apply compression if necessary to control the dynamic range of the piano’s sound. This can help ensure a consistent and controlled sound throughout the performance.
- Reverb and Effects: Consider adding reverb or other effects to enhance the spatial and tonal qualities of the recorded sound. Be mindful of the overall balance and avoid overpowering the natural sound of the grand piano.
Conclusion: Achieving professional sound quality when micing a grand piano
Micing a grand piano requires careful consideration of microphone types, placement techniques, and sound optimization. By following the tips and techniques outlined in this comprehensive guide, you can capture the true essence of a grand piano and achieve professional sound quality.
Remember to experiment, listen carefully, and make adjustments as necessary to achieve the best possible sound when micing a grand piano.
Frequently Asked Questions
Where do you put the microphone on a grand piano?
When it comes to miking a grand piano, one of the most common questions is where to position the microphone. The placement of the microphone can greatly affect the sound quality and capture the true essence of the instrument. To achieve the best results, it is recommended to place the microphone inside the piano, near the hammers.
This allows for a more focused and intimate sound, capturing the nuances and dynamics of the performance. However, it is important to experiment with different positions and angles to find the sweet spot that suits your desired sound.
Another popular placement option is to position the microphone above the strings, commonly known as the “overhead” technique. This method captures the overall sound of the piano, including the resonance and ambience of the room.
It provides a more open and spacious sound, ideal for capturing a live performance or when a more natural sound is desired. Experimenting with different microphone positions and angles will help you find the perfect balance between capturing the direct sound of the piano and the room’s acoustics.
What mic do you use for a grand piano?
Choosing the right microphone for miking a grand piano is crucial to achieve the desired sound quality. There are various types of microphones available, each with its own characteristics and applications.
When it comes to miking a grand piano, condenser microphones are often the preferred choice due to their ability to capture the nuances and details of the instrument.
A popular microphone for miking a grand piano is the Neumann U87. This microphone is renowned for its versatility and exceptional sound quality. It offers a natural and transparent sound, making it an ideal choice for recording a grand piano.
Other popular options include the AKG C414 and the Audio-Technica AT4050. These microphones are known for their ability to handle high sound pressure levels and deliver a clear and balanced sound.
Ultimately, the choice of microphone depends on personal preference and the desired sound. It is recommended to try out different microphones and compare their sound characteristics to find the one that best suits your needs.
How do you record a grand piano with one mic?
Recording a grand piano with just one microphone can be a challenging task, but with the right technique, it is possible to achieve great results. One common technique is the “spaced pair” or “AB” technique. This involves placing the microphone a few feet away from the piano, capturing the overall sound of the instrument and the room.
To implement this technique, position the microphone at a height of approximately 3 to 5 feet above the piano, pointing towards the center of the instrument.
Experiment with different distances and angles to find the optimal placement that captures the desired sound. It is important to ensure that the microphone is positioned equidistant from both ends of the piano to maintain balance in the stereo image.
Another technique for recording a grand piano with one microphone is the “mid-side” technique. This utilizes a single microphone with a figure-eight polar pattern, such as the AKG C414.
Position the microphone in front of the piano, with the null point of the figure-eight pattern facing the sound source. Place a second microphone, set to a cardioid polar pattern, directly behind the first microphone. Adjust the levels of both microphones to achieve the desired stereo image.
Experimenting with different microphone techniques and placements will allow you to find the best approach to capture the unique sound of a grand piano with just one microphone.
How do you mic vocals on a piano?
When recording vocals on a piano, it is important to consider the balance between the vocals and the piano sound. The primary focus should be on capturing the vocals clearly while maintaining a natural blend with the piano.
One common technique is to use a separate microphone for the vocals and the piano. For the vocals, a large-diaphragm condenser microphone, such as the Neumann U87, can provide a warm and detailed sound. Position the microphone at a distance of approximately 6 to 12 inches from the vocalist’s mouth, slightly off to the side to avoid plosive sounds.
To capture the piano sound, a microphone can be placed inside the piano near the hammers or above the strings, as discussed earlier. Ensure that the piano microphone is positioned to capture the sound of the instrument without picking up excessive vocal bleed.
During the mixing stage, it is crucial to balance the levels of the vocal and piano tracks to achieve a cohesive and natural sound. Additionally, applying subtle EQ and compression to each track can help enhance the overall blend and ensure that both elements are well-defined in the mix.
How do you record a grand piano?
Recording a grand piano requires careful planning and consideration to capture the true essence of the instrument. Here are some essential steps to follow when recording a grand piano:
- Preparation: Before recording, ensure that the piano is properly tuned and in good condition. Remove any objects that might cause unwanted vibrations or noises during the recording.
- Room Selection: Choose a suitable recording space that complements the sound of the grand piano. Ideally, opt for a room with good acoustics and minimal ambient noise.
- Microphone Placement: Experiment with different microphone techniques and positions to find the one that best captures the desired sound. Consider placing microphones inside the piano, above the strings, or using a combination of both for a balanced and dynamic sound.
- Test Recordings: Before starting the actual recording, perform test recordings to evaluate the sound quality and make any necessary adjustments. This ensures that you capture the best possible sound during the recording session.
- Monitoring: Use high-quality headphones or studio monitors to accurately monitor the sound while recording. This allows you to make real-time adjustments and ensure the optimal sound quality.
- Post-Processing: After recording, carefully listen to the recorded tracks and make any necessary edits or enhancements. Apply EQ, compression, and other effects to achieve a polished and professional sound.
By following these steps and experimenting with different techniques, you can successfully record a grand piano and capture its rich and expressive sound.
CTA: Whether you’re recording a solo piano piece or providing sound reinforcement for a live concert, properly micing a grand piano is crucial for achieving the best sound quality. Follow this comprehensive guide to learn the techniques and tips for micing a grand piano like a professional.
- Yuja Wang Family – All There is To Know! - June 4, 2024
- Top 10 Adjustable Piano Chairs in 2024 - June 2, 2024
- The 10 Most Popular Types of Jazz Piano You Need to Check Out! - May 31, 2024